Loading data
In the tab, you can define where your data is located, its naming convention, and load selected images to test the analysis.
Info
Most specified parameters (except the channel list), will be stored and reused when you launch ImJoy the next time.
Demo data
Already processed demo data is available from within the FISH-quant interface, when you press on the button Get zipped (demo) data.
Pressing this button will download these data, and pre-fill the necessary fields in the user-interface.
Typical workflow
Data specifications
In this dialog, you can specify
- The ROOT folder. This is the folder with both the imaging data (
acquisition) and the analysis results (analysis). - Names of the subfolders containing images (by default
acquisition) and analysis results (by defaultanalysis) Regular expression: define the naming convention of your files with a regular expression. For more details, see the dedicated section.Pixel size: provide the pixel-size in XY, and for 3D images the spacing of the individual z-planes. Both values are provided in nmm.- [optional] z-first. In some rare cases, 3d images are read in the wrong order, and the z-axis is confused with the X or Y axis. Diabling this option usually helps to prevent this issue.
Channels: Specify channel(s) to be analyzed. Here you have to specify a name you want to use for a channel, e.g.fish, and the string (as defined in the regular expression) for the channel in the file-name.

Scan folder and load one image
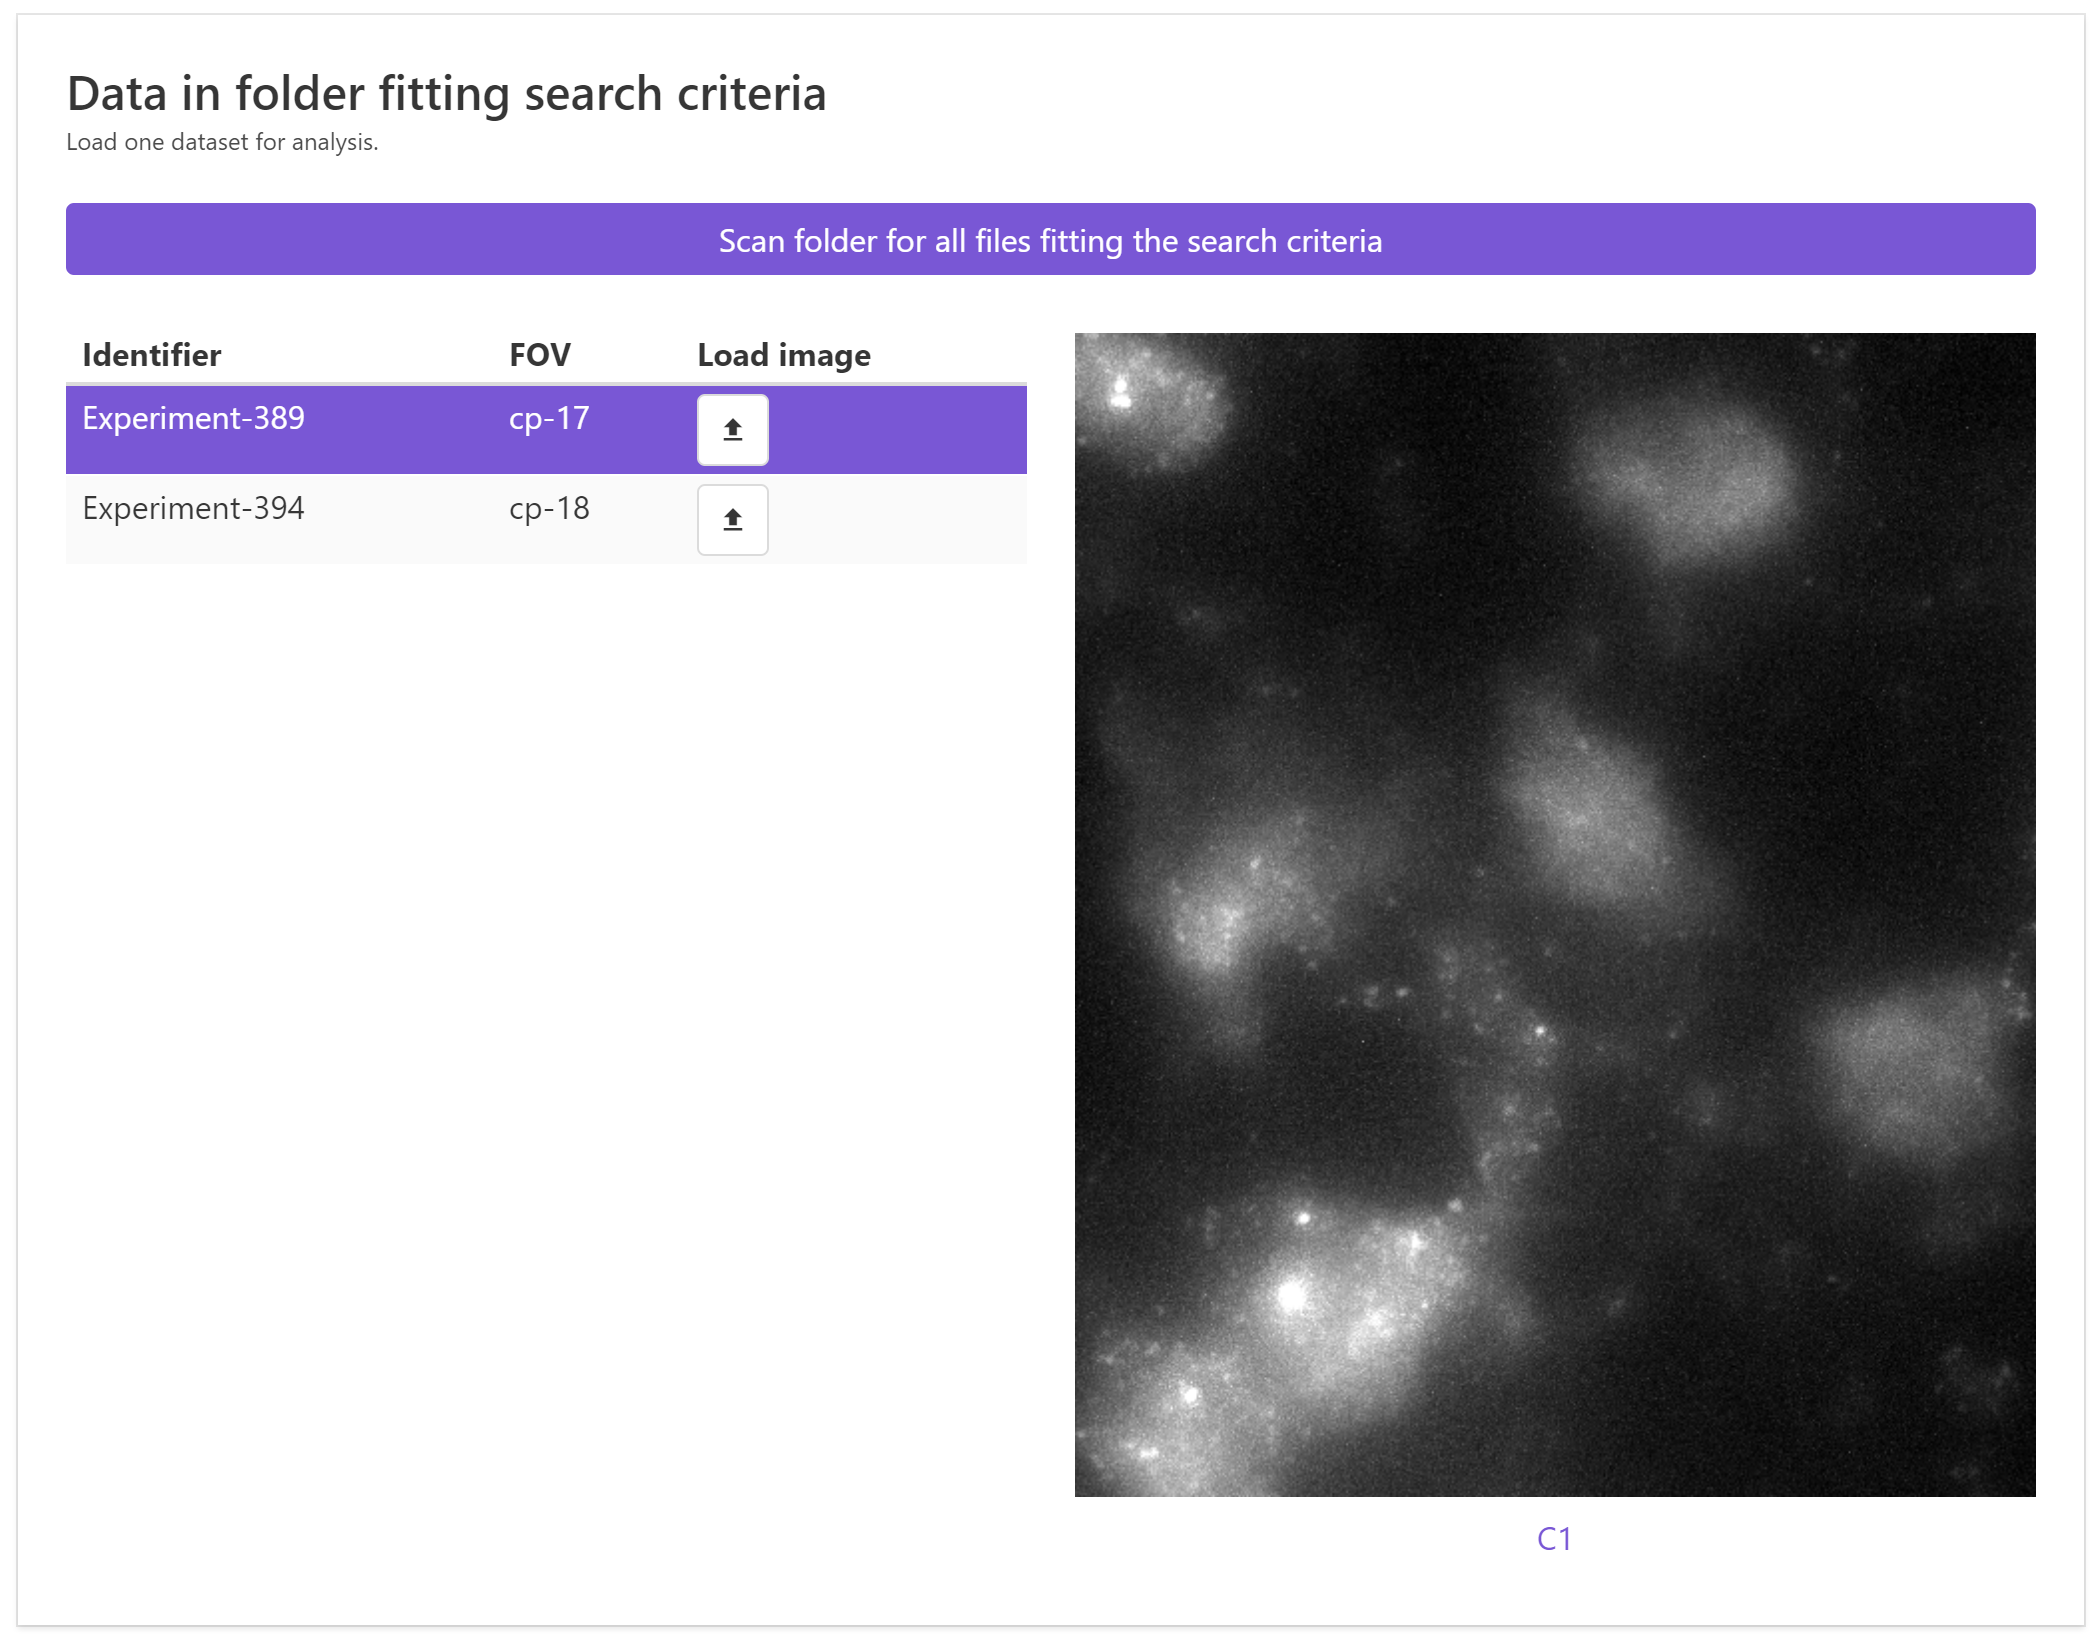
- Once all parameters are defined, you can press
Scan folder .... This will scan the folder for all images satisfying the selection criteria. Only images that satisfy all criteria, e.g. they must have all specified channels, will be listed. -
A list in the lower part of the interface will then be populated. You can load an image by clicking on the download symbol. This will load for the selected position all specified channels and show them in the image carousel on the right. The loaded image will then be indicated with a purple background and its specifications shown in the drop-down menu "Analysis info" in the upper part of the image.
Double-clicking on an image will show it in the image viewer.
Troubleshooting
No images were found
This means that the specified criteria did not provide any positive hits. This can have several reasons:
-
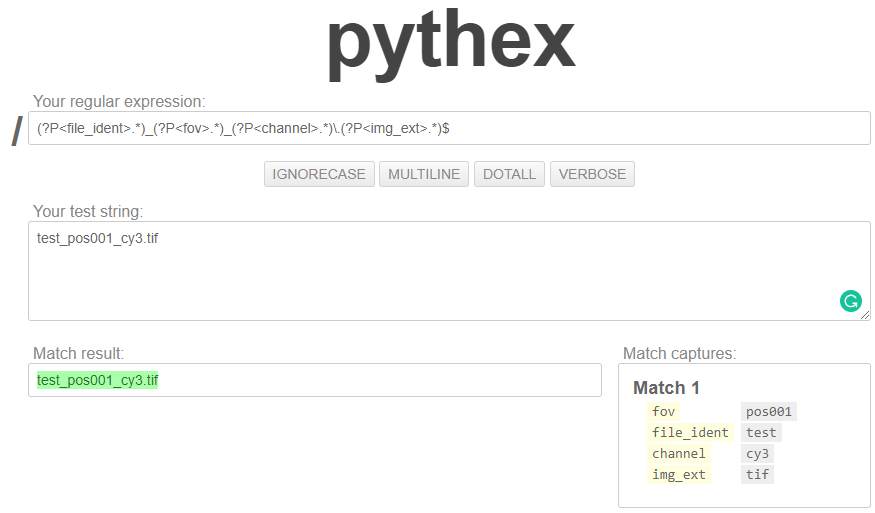
Regular expression is not correct. You can test your regular expression by pressing the button
Test regexp. This will open a new window where you can test your expression on your file-names. The first line will be automatically populated with your regular expression, as a test-string you can specify your file-name. If the regular expression is correct, you should a populated list underMatch catpures, where the identified parts of the file-name are listed.